Silent Printing on client’s printer is considered to be security hazard and is not recommended to general applications. It would not sound great when you are browser a web page, the browser sending document to your printer without your confirmation.
But with advanced web applications, other than regular websites, such as your web based CRM application, there are requirements for silent printing. The users don’t like clicking the buttons to start printing time and time again.
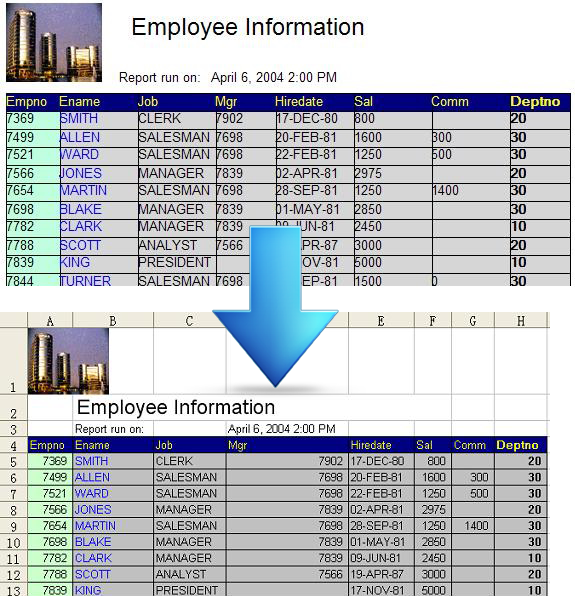
I came across such requirement recently where I need to print a pdf report generated by Jasper to client computer silently. I am discussing here the example code snippets for this mechanism. The example discussed here uses GTD Printing Tools. This example elaborates the method of sending pdf directly to a printer from the web server without opening it into clients Acrobat Reader. This example has been tested successfully on Windows 8 with IE11 and Acrobat Reader DC.
How it works.
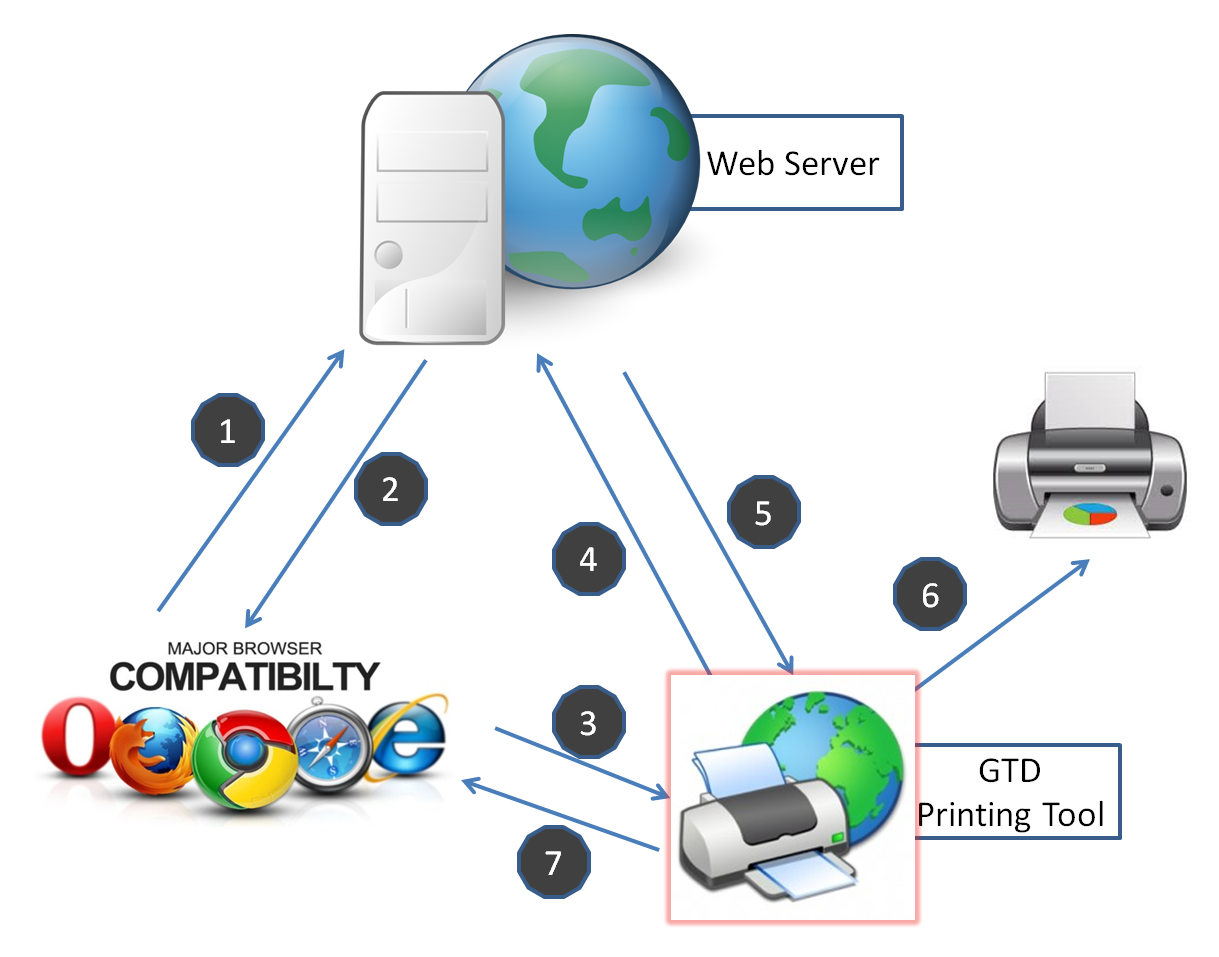
- Send request to web server, the server will generate to PDF report.
- The web server returns web page with the link to PDF file generated on step 1.
- The web page returned on above contains script written with Javascript, it will send the request to local GTD Printing Tools Web Server automatically (http://localhost:47865/), and the link to PDF file is passed to GTD Printing Tools as a parameter.
- GTD Printing Tools received the link, and cookie if exists, and send request to web server, by this means to download the PDF file.
- Web page return content of the PDF file, GTD Printing Tool will save it to temporary file.
- The GTD Printing Tool call Acrobat Reader, send PDF to printer.
- The GTD Printing Tool returns an html page to browser, direct the browser to web server.
The user just need to click submit button on step 1, and then the pdf report will be printed silently.
Quick start
Now let’s spend 5 minutes, and test this solution.
1. Download and install GTD Printing Tool.
The GTD Printing Tool can be downloaded from this link:
https://www.lv2000.com/products/setupGtdPrintTool.zip
After download the installer, please unzip the file and double click the installer, the wizard will guide you through the installation.
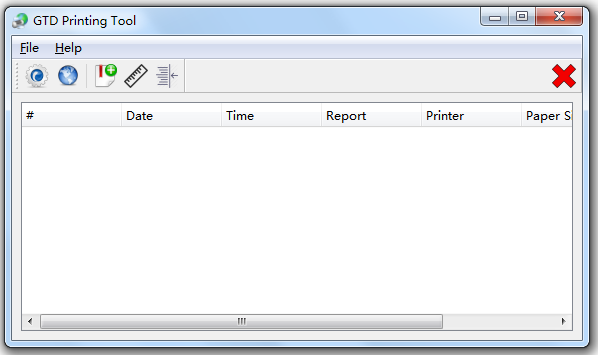
After install the software, start the program by click button in start menu.
It may take a long time to start the program because it need time to collect data of printers, especially network printer.
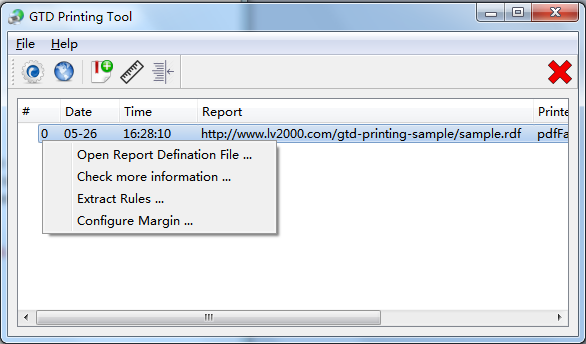
The main window is shown below:
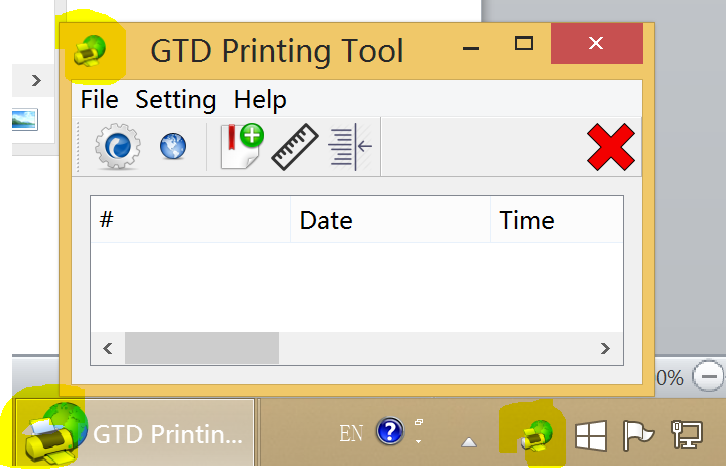

Please click “Setting” memu, “Print PDF Configuration…” button, a dialog appear, and then enable PDF printing.

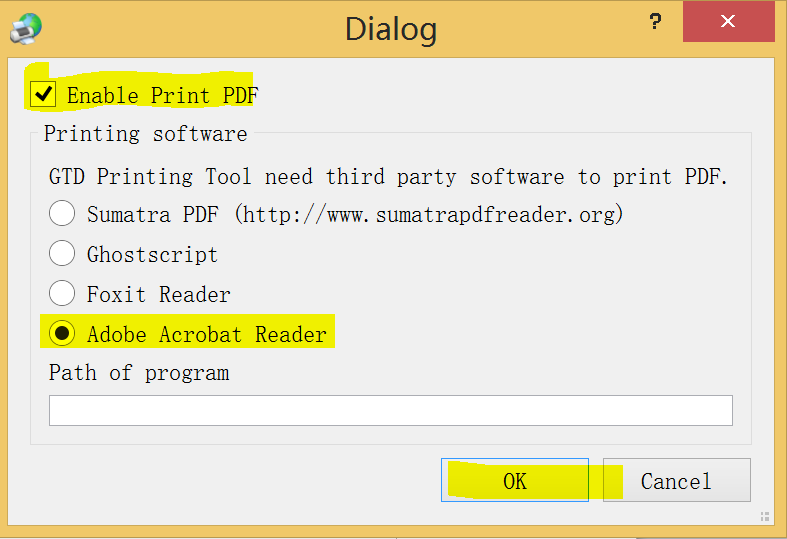
GTD Printing Tool support 4 types of printing software till now.
2. Visit www.lv2000.com, it works as web server in this example.
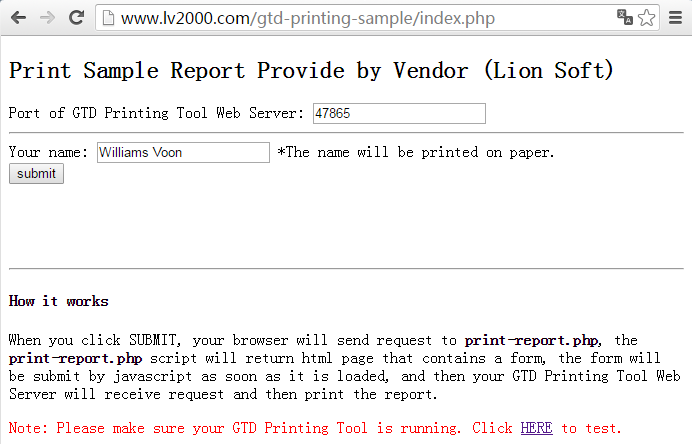
Please point your browser to https://www.lv2000.com/gtd-printing-sample/print-pdf.php
The web page looks like this:

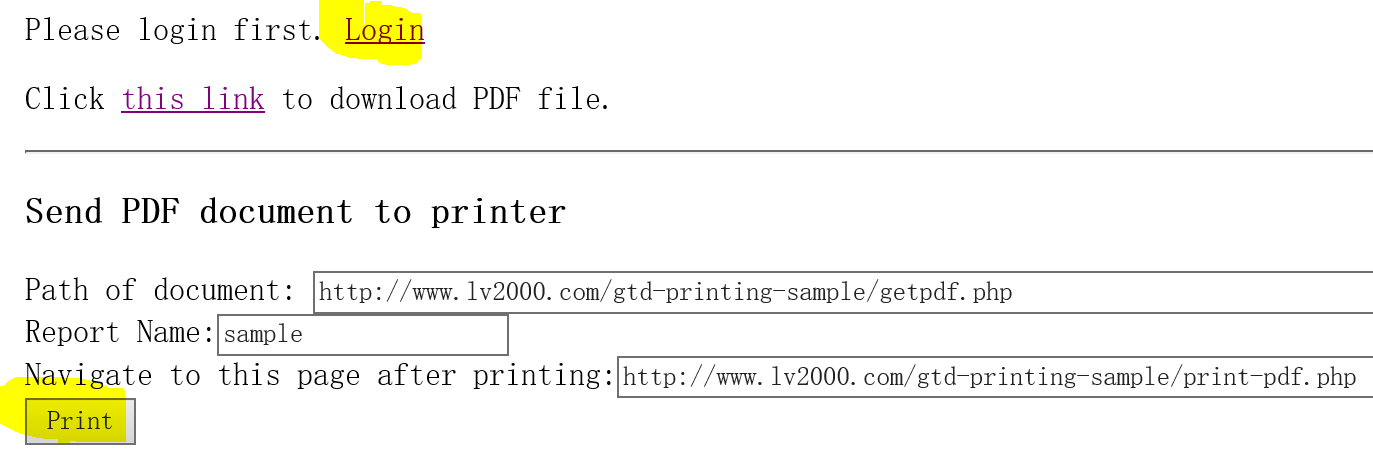
The PDF file can be downloaded from this link: https://www.lv2000.com/gtd-printing-sample/getpdf.php
The getpdf.php script will return the report output in PDF format.
You should please login first, otherwise you are not permitted to download the report output, the PDF file. The getpdf.php script will check whether you are authorized to download the PDF file.
This page contains a form. The HTML source code of the form is listed below:
<form action="http://localhost:47865/printdoc" method="post" >
Path of document: <input type="text" name="docPath" id="docPath" value="http://localhost/gtd-printing-smp/getpdf.php" size="80"/><br>
Report Name:<input type="text" name="reportName" value="sample"/><br>
Navigate to this page after printing:<input type="text" name="navigateTo" id="navigateTo" value="" size="80"/><br>
<input type="hidden" name="cookie" id="cookie" value=""/>
<input type="submit" value="Print"/>
</form>
</p>
<script>
document.getElementById("docPath").value= window.location.href.substring(0,window.location.href.lastIndexOf("/"))+"/getpdf.php";
document.getElementById("navigateTo").value=window.location.href;
document.getElementById("cookie").value=document.cookie;
</script>
When you click the Print button, the following information will be sent to GTD Printing Tool Web Server.
Path of document: The URL of the PDF file.
Report Name: The name is used to create rules on client computer.
navigateTo: When you submit the printing job, you might want the browser navigate to web page of your own application. You can specify the URL here.
Cookie: Used to download PDF file. For example the link https://www.lv2000.com/gtd-printing-sample/getpdf.php requires session, so your browser should pass the cookie to GTD Printing Tools.
3. Invoke GTD Printing Tool to print PDF.
Now please click the Print button, and then the pdf will be printed to default printer.
How it works
1. Your browser will post the form to GTD Printing Tool Web Server (URL: http://localhost:47865/printdoc ) when you click the Print button. The link to PDF file will be passed to GTD Printing Tool.
2. GTD Printing Tool Web Server receives the request, and then downloads the PDF file.
3. After the PDF file downloaded, GTD Printing Tool will choose printer according to report name (Named “sample” in the example). If no rule associated with report name, it will choose default printer.
4. Call Acrobat Reader to print pdf file.
5. The browser will navigate to next page you specified. In this example, the page is https://www.lv2000.com/gtd-printing-sample/print-pdf.php
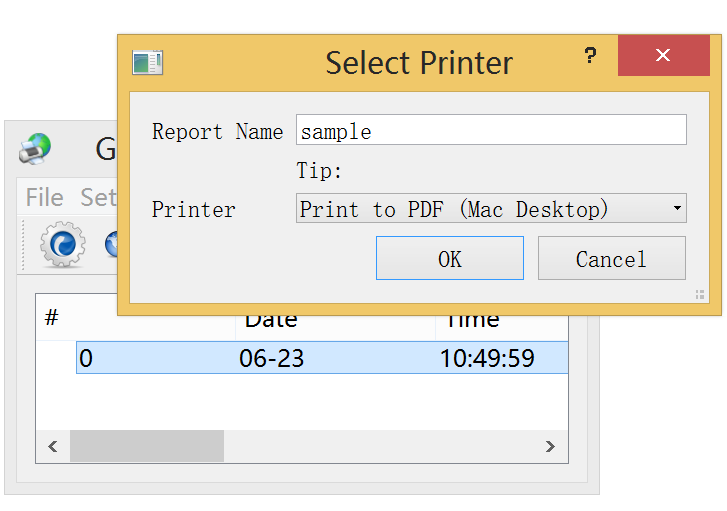
4. Setup printer for specified report.
1. Right click the task. Select “Specify default printer for report xxxx …”

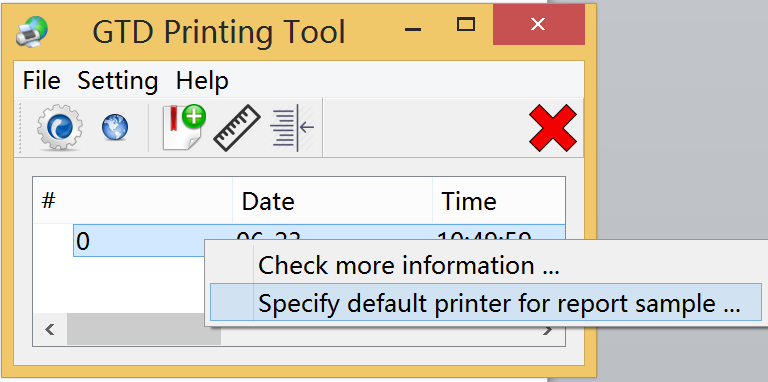
2. Select printer and click OK to save.

True silent printing
In the example above, you click the Print button and submit form to GTD Printing Tool Web Server. This click is unnecessary!
The form can be submitted automatically by javascript.
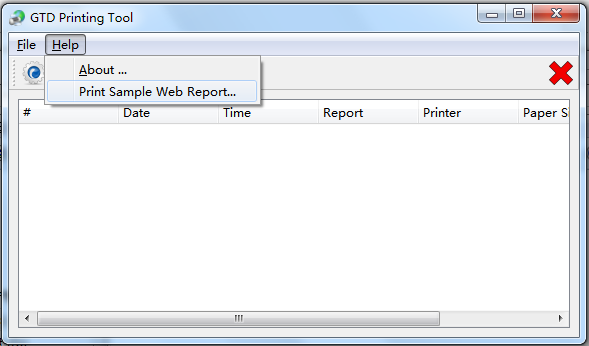
If you have login, you will see this link: https://www.lv2000.com/gtd-printing-sample/print-pdf-one-stop.php


Please try it!
When you invoke the print-pdf-one-stop.php from clients machine it would send a print command to clients printer as soon as the returned page displayed in your browser.
Source code of above php scripts
The source code can be found in GTD Printing Tool installation pack. Generally speaking the folder path is C:\Program Files\GTD Printing Tool\gtd-printing-sample
 CGI interface, and then customer deploy it in cgi-bin folder of Apache server. The Rep2excel can be called by other computers via browser, and return the excel file.
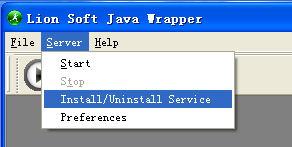
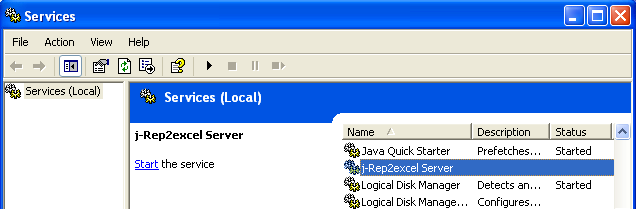 You can start/stop the service by this command:
 s and business data (like tablespace usage), you should please create JDBC database connection to your Oracle database.